

You’re Not Alone. The Photo-Load Is Real.
This is the first post in a short memory-keeping + photo-organisation series to help you get your beautiful memories off your device and into your life.
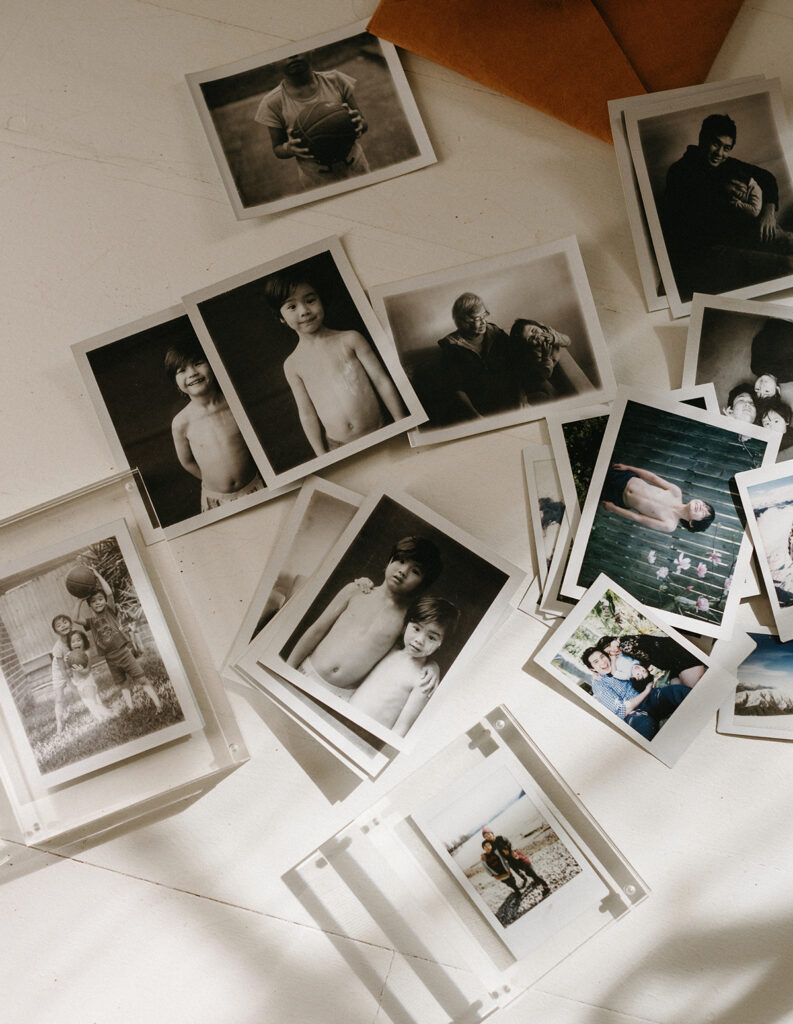
Somewhere on your phone right now, there are probably thousands of photos. A blurry one of your kid mid-blink. A duplicate. Several duplicates. A screenshot you forgot about. And buried somewhere in the middle of all of that — a genuinely beautiful moment you know exists but you can’t easily find.
Sound familiar?
Yeah. Me too.
Let’s just say you and I are both living our fullest lives, and the photos are piling up because so much is happening. That’s actually a good thing, even when it doesn’t feel like it.
But I also know the guilt that lives inside that ever-growing camera roll, usually surfacing most at the end of the year, or when birthdays roll around and you’re reminded that family albums have still not been started, despite the “I really need to do something with all of these” thought that visits every few months and then vanishes when real life pulls you back under.
I’ve been there too.
So this is the first in a three-part series I’m putting together, because I believe the memories you’ve captured deserve more than a graveyard folder on a do-everything phone. Hopefully these little tips make the whole thing feel easy — and not just another project on the list.
Let’s start with the simplest place: getting organised.
A Disclaimer Before We Begin
This is not the most comprehensive system — simply because I am not the most comprehensively organised person. There are probably a hundred other things I could think of if I tried to dive into the minutiae, but I also know that if I did that, it would remain a theoretical masterpiece and simply never get done.
So I’m sharing what works for me, what I can keep up with, and what I feel comfortable with for my family and our precious memories. Take what resonates, leave what doesn’t.
____
Tip #1: The Only Folder System You Actually Need
You don’t need an elaborate tagging system or a colour-coded spreadsheet. Here’s what works.
One folder per year. Inside that, one folder per month or per event — whatever feels more natural to you. That’s it.
(Optional: I like to add dates to the front of my event names so the folders are always visually chronological.)
Example: 2026 → 01 January → 260130 First Day of School
If you can’t remember exactly when something happened, simply sort your photos by date and move the images into a folder named something like 2601 January-Other. Done is better than perfect here.
Moving photos from your phone to your computer: Link up your phone via USB and open your photo library or preferred folder destination. I use the Image Capture app built into Mac, or you can follow this guide here. For PC users, there are equally simple built-in tools to get you started. Important note: start with the current year first, and attend to the backlog only once your system is set up.
____
Tip #2: Back It Up. Twice.
This is the one rule I’ll be firm on, because I’ve seen the heartbreak of lost images — and I never want that for you.
My advice is for your photos to live in two places that are not the same device. Here’s an easy combination:
- Google Photos or iCloud: Turn on automatic backup. It runs in the background. You don’t have to think about it.
- An external hard drive: A basic 1–2TB drive from JB Hi-Fi or Amazon will do the job. Once a year, plug in and back up.
Together, this is the closest you’ll get to photo insurance.
A Note on Your Professional Galleries
Here’s some good news: the images from our sessions together? Those are already the easy ones. Edited, curated, and delivered in a gallery that’s ready to download and drop straight into your folder system. If you haven’t done that yet — now is an excellent time. Pull them in, rename the folder if you like, and give them a permanent home on both a physical and cloud storage drive. They’re already the best of the best (no bias, ha!). They deserve to be taken care of.
____
Tip #3: Don’t Just Read This. Do It.
Let me leave you with just one small thing to do this week.
(Not the whole camera roll from forever just yet.)
Create one folder. Label it 2026.
Within this folder, create another for each month so far this year — January, February, March — and move your photos into it from both your phone and any camera photos, saved gems from WhatsApp, all of it. By date or event if you have that many, or simply by month. That’s your starting point. If that felt too easy, go ahead and tackle 2025 too — but that’s completely optional.
Whether you are three or thirteen years behind, I promise this is a task that can get done — slowly but surely. You just need to build it up one folder, one year, one intention at a time.

Reader Q&A: Real Questions About Organising Family Photos
Q: How do I keep up with organising photos when life is busy?
The simple answer is: after a significant event, spend ten minutes moving your favourite photos into the right folder for that month. Keep up with that event by event (or at the end of each week or month) and you’ll be in a really good place.
My longer, more honest answer? I don’t really keep up with this when life is busy. There are so many things that demand my attention — especially in the busier seasons — that this is truly only something I sit down to do when the pace slows. And even then, it’s a conscious effort, simply because I know it matters. It matters to me. I know it will matter to my kids. And chances are, it matters to you if you’re reading this too.
So I guess it’s about being equipped with knowing what to do without being overwhelmed, so that when you can carve out the time, you’re ready. And making sure it remains a priority — so it doesn’t completely slip off the radar. Once you realise it can be done in an hour here and there, in a way that fits into your life, it’s something you’ll begin to squeeze in when the kids are happily off watching a movie, or while you catch up on your favourite podcast and feel like keeping busy. For me, this is usually in winter, or in a few stolen quiet days straight after new year.
For the more organised among you: set a reminder the way you set a reminder to pay your monthly bills. A monthly rhythm to clear your phone and update your backups, so you can rest assured your photos are safe — even if they’re not perfectly organised just yet.
What’s Coming Next in This Series
Next time, we’re talking about how to get your photos off the screen and into your actual life. We’ll cover how to choose your favourites, how to get them onto your walls, into printed albums, and into the things your kids will grow up seeing. That’s the part that really matters!
____
Frequently Asked Questions
The simplest system is one folder per year, with subfolders by month or event inside. Start with the current year, move photos from your phone via USB, and don’t worry about perfecting the backlog first. Done is better than perfect.
The safest approach is two storage locations that aren’t the same device — a cloud service like Google Photos or iCloud with automatic backup, and an external hard drive you update once a year. Together, they act as photo insurance.
Connect your phone via USB and use your computer’s built-in photo import tool — Image Capture on Mac, or Windows’ built-in photo importer on PC. Start with the most recent year first before tackling any backlog.
Ideally, after any significant event — spend ten minutes moving photos into the right folder. If that feels like too much, a monthly rhythm works well. Set a recurring reminder the way you’d set one for bills.
Yes of course! All my family photography sessions include access to a curated digital gallery ready to download and preserve, with options to add prints, albums, and wall art (and the best part is that I handle this all for you and you don’t need to lift a finger!) Learn more about sessions here.


